First things first: It's the weekend, so it should be cocktail time. I know you were all wondering when I'd bring in my love of cocktails and share my cocktail secrets with you. Just kidding, there are no secrets, just lots of cocktails.
Cocktail for this project:
Since this is an all day extravaganza (in between paint dry times and etc.) I will be drinking a cocktail that tastes just as delicious when not freezing cold and still holds up after the ice melts a bit.
Rosemary Lemonade (serves 4) (recipe courtesy of Laguna Beach Culinary Arts):
6 sprigs rosemary
1 cup sugar
1 cup lemon juice
8 oz. Vodka (or more, depending on taste)
1 liter Club Soda
In a 1-quart saucepan, combine sugar, 2 rosemary sprigs, and lemon juice. Let it simmer on low for roughly 5 minutes until lemon stirring every 30 seconds until all the sugar is dissolved in the lemon juice. Be careful to not over cook it as the rosemary will start to make it a little bitter.
To serve, fill a 16 oz glass with ice and put one rosemary sprig in each glass. Add 3 tablespoons of rosemary lemon syrup to each glass (you will have extra, so no need to be precise). Next, add your roughly 2 oz of vodka and stir well. Final touch, fill the rest of your glass with club soda, give it one last quick swirl, and ENJOY!
Now onto the project!
I orginally bought this bench as my first piece of furniture when I moved into my apartment with the intention of recovering it and perhaps adding a bit more fluff to it's kind of lifeless seat. I have lived here for over a year and I am finally getting around to it. Some projects With pretty much all projects, I struggle to find that initial "heave-to" to actually start-or, like in this case, and complete-them.

What I love about this project is that it is so simple and easy to do. No sewing is necessary, just a staple gun and a hammer (for those pesky staples that just won't go in all the way). I chose to repaint the wood as well, because it was painted brown...yes that is right, painted brown. I know, I still can't understand why someone would paint the wood brown either. Mind-boggling.
What You Will Need:
- Staple Gun and 3/8" staples
- Small light-duty hammer (a tack hammer or mallet would work best)
- 1/2 to 1 yard of upholstery fabric (depending on size of seat)
- 2" Foam 1/3 yard, optional (depending on size of seat & desired height of cushion)
- 1/2 yard to 1 yard of batting, nothing too thick, this is just gives a smoother look after all fabric is on
- Spray Paint and Spray Primer
Lay fabric out on a flat surface and place batting on fabric; cut off any excess. Cut foam with a serrated blade to seat size and then place it centered in your batting. Lastly, place seat on foam upside down. When securing fabric to the seat, corners are last! Starting with the two shorter edges, pull fabric taut and staple outside edges first, then in the middle. Repeat on the long edges, stapling from the outsides towards the center. It is important to keep your stapling consistent on opposing sides. For the corners, for a nicely upholstered look, fold them like you would a present and align them either on the long side of your bench or right along the corner. (If you have more rounded corners then follow the rounded edge and do not fold into a triangle like shape.)
Enjoy these photos of the before paint progress!


Now for the fun. I don't know why, but painting is always something I enjoy. A viable excuse to be messy? Maybe. Viable excuse to get paint on myself? More likely... Anyways, I love painting.
Steps for Re-surfacing.
Step 1: To prep your piece, get your lovely re-upholstered top as far away from your wood to be painted as possible. Nothing is going to ruin your work on that seat cushion. Well, at least not the paint.
Step 2: Lightly sand your surface all over. This will give something for the primer to adhere to.
Step 3: On a not windy day with lots of sun (yes those days do exist in Seattle, they are just a little rarer.) lay a plastic paint tarp from the Dollar Store down and place your seat bottom in the center upright.
Step 4: Spray your piece with Primer. I know you are all scoffing at the primer since so many paints come with it mixed in, but trust me, it helps big time. When spray painting, maintain about 8-9 inches of distance between spray can and piece of furniture, this helps with dripping; also keep the spray moving, too much paint in one area will make the paint drip. Let it dry completely. Estimate 45 min.
*Quick note about primer: the color of primer is very important. If you are painting over anything with red or black undertones or painting with any red or black undertones, use a gray primer. Gray is great for really covering over those strong colors and keeping the top color more true to its actual color.*
Step 5: Flip the seat over, lightly sand and then it's time for Primer round 2! Let dry completely.
Step 6: Bring on the color!! Flip seat to upright position once more, spray all over with color. Let it dry 45 min. Flip over and repeat. After it is dry, check for any missed spots and paint as needed.
Step 7: If desired, spray with a gloss or matte sealer. Let it dry for 24 hours.
Step 8: Re-assemble your seat by lining up screw holes and screw everything back together.
Congratulations! You have just successfully refinished a piece of upholstery! Check out my completed bench! Isn't she a beaut!
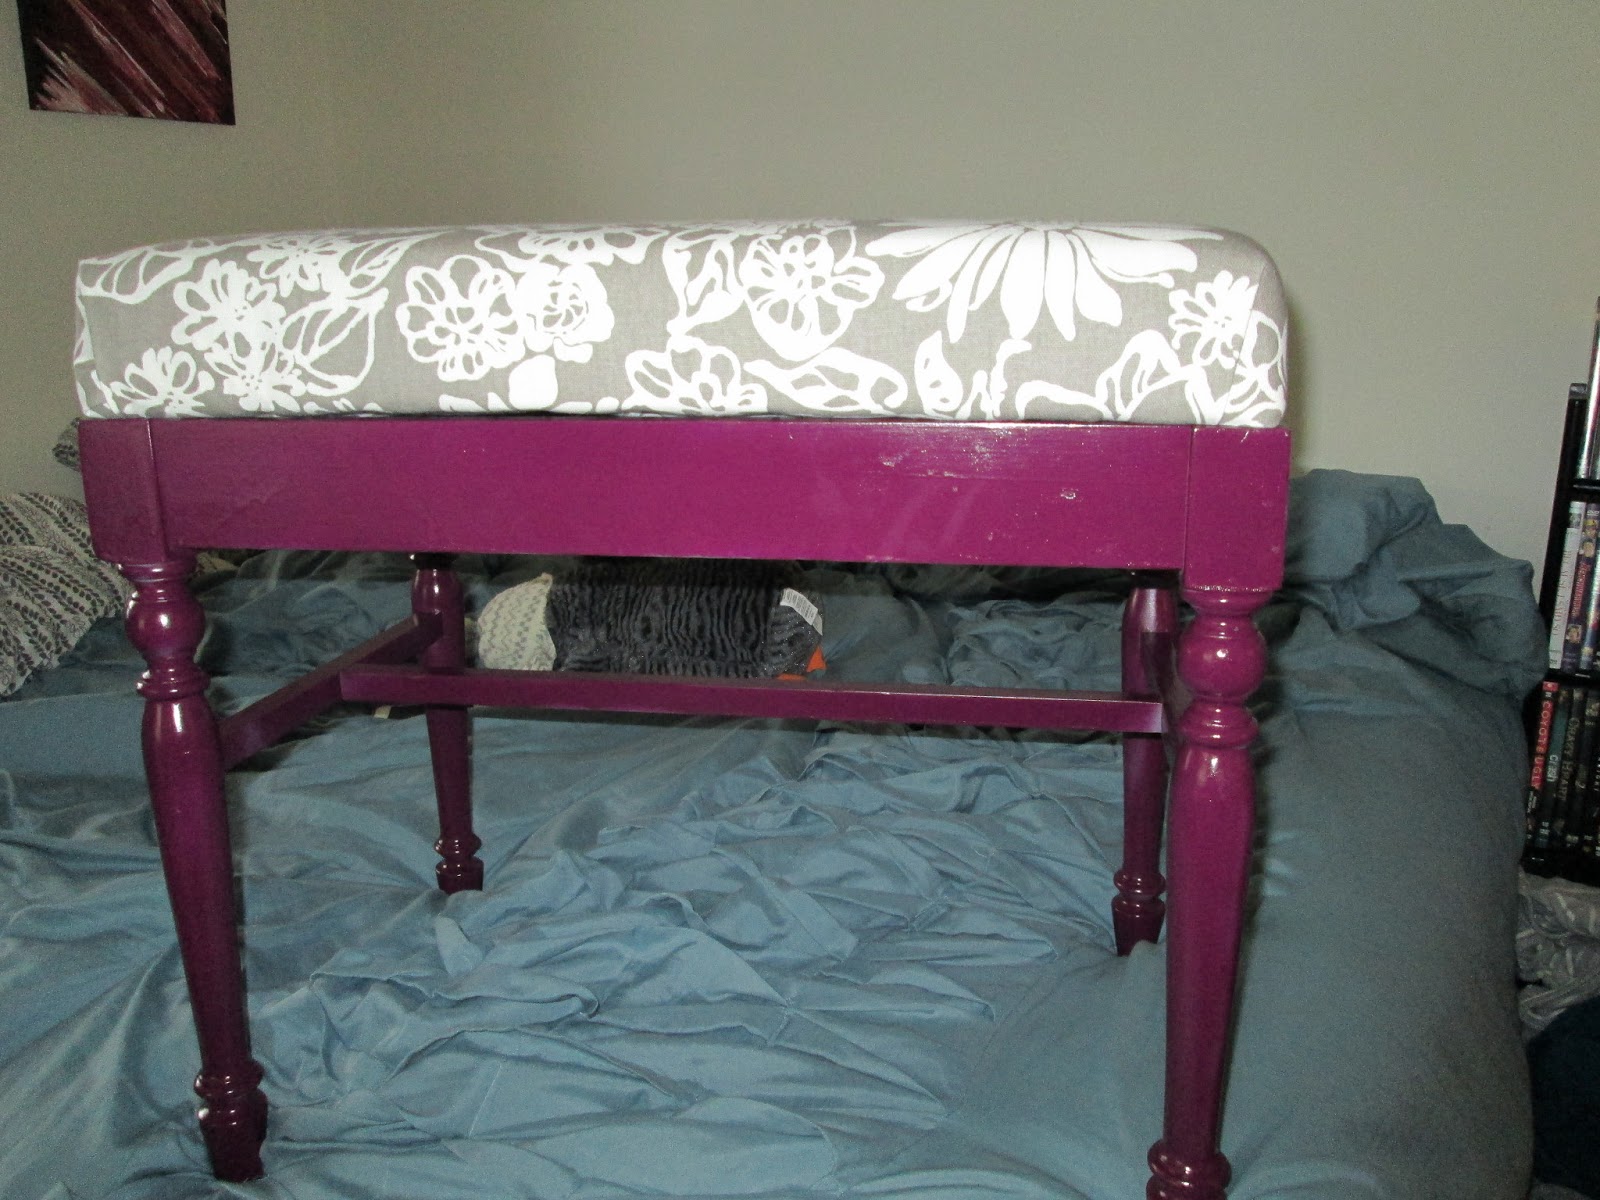 |
| I was not expecting the color to be this vibrant, but I really love it! Such a beautiful shade of purple. |
 |
| Love, love, love. |
 |
Love Always,
Joanna Rose