I moved into this apartment one year ago, and if any of you DIYers are like me, the improvements are never-ending. I finish one improvement only to discover four more that had been "band-aided" by the original
solution quick-fix. Holy shit, I need
more space less stuff.
I found this lamp at Goodwill Ballard for $2.99 (yes that's right). It did not come with a lamp shade or lamp harp...I should have put it down, but it's so beautiful! (And I'm stubborn and wanted the beautiful lamp in my apartment.) I saw this $15-$20 lampshade at Fred Meyer and decided to use it as my inspiration piece. Are you ready for a cheap, fun, no-sew lampshade?
Read on! (too corny, I'm sorry)
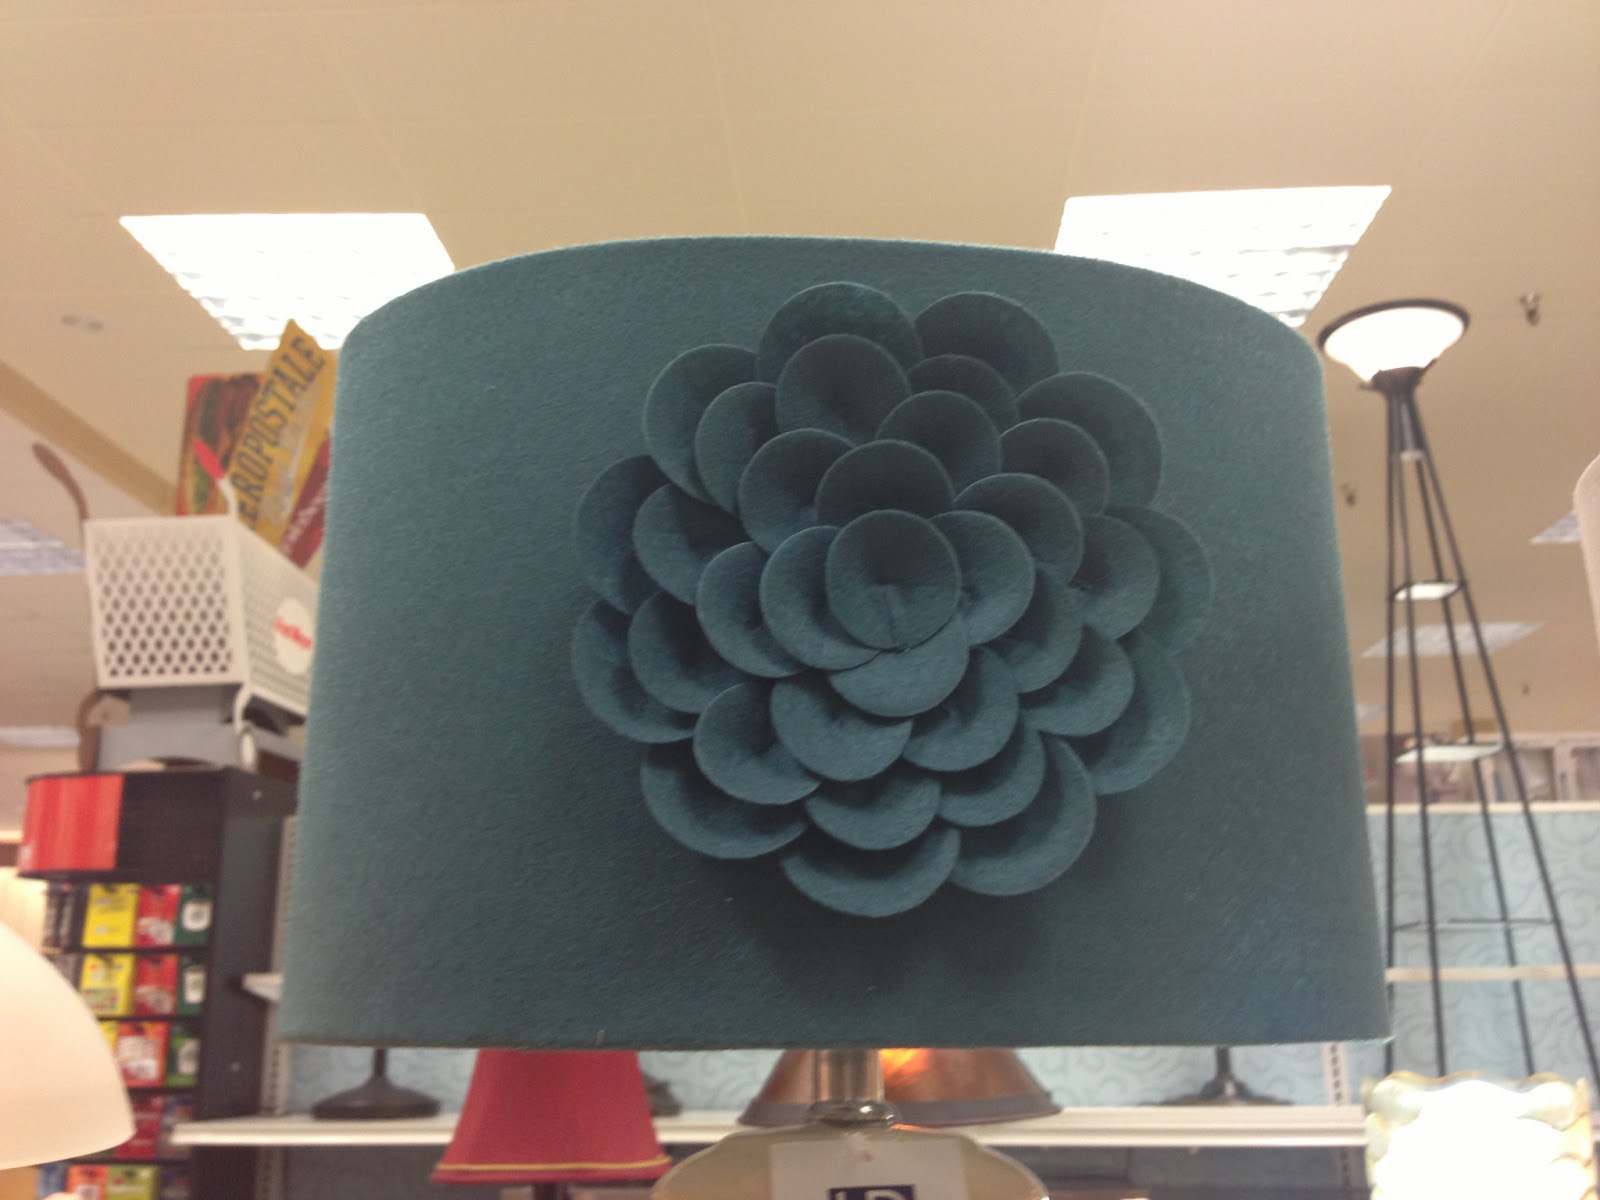
I love the deep teal color on this lampshade and the felted flower. *Love*Love*Love*
I found the perfect bright teal felt and decided to put lots of smaller flowers with pearl centers rather than one large flower. So without further ado, here is the lampshade pre-makeover:
Pretty hideous, right? This was perfect for my lampshade makeover!
What You Will Need:
- Lampshade
- 1/2 yard felt (depends on size of lampshade) - $2.49
- glue gun
- scissors
- thread and small needle
- 10 mm glass pearls - $1.00
- 1 yard half pearl trim - $1.79
To get the right pattern for recovering the frame of the shade, you take a pen (or piece of chalk) and place the shade seam side down and start rolling the shade and tracing along the bottom until the shade has completed a full circle. Place the seam at the start of the first line and roll and trace the top until the shade has again gone full circle. Allowing for 1/2 inch seam allowance on top, bottom, and sides, cut out the piece. Line up the lampshade so that there is 1/2 inch on top and 1/2 along the bottom. Wrap the piece around the lampshade so the sides connect. Fold over the top side for a nicer edge finish and hot glue in place. Starting on the top fold sections of the overlap over the top edge and hot glue to the inside of the lamp shade. Repeat until all top overlap is glued. Now flip the shade over and repeat with the bottom. Make sure that the fabric is taut before glued the bottom down.
Now for the real fun. Edge the bottom (& top if you wish, but you will need to buy more trim is desired) with the half pearl trim. It should look like this once you have reached this step:
I know I said this was a No-Sew project, but this step is so easy, you will not feel like you are sewing. For forming the flowers, you will need to cut small circles roughly 1" to 1 1/2" wide. Fold a circle in half and pull thread through; repeat for five - six circles. Once you are done adding circles, pull the thread back through the first circle, so that the "petals" come together and actually look like a simple flower. Tie a knot, cut the thread and hot glue onto the shade; then hot glue one pearl in the center of the flower. (See above for a flower sample.) I found this step much easier with the shade already attached to the lamp base. (Think decorating a cake on a cake stand.) Repeat flower making/attaching processes until you are happy with the number of flowers on the shade.
Didn't it turn out great?!? How did your lamp shade makeovers turn out? I'd love to see, so comment below with pictures or links!
Many Blessings!
Joanna Rose


No comments :
Post a Comment