Just an update on my friend. (Follow up post to Fragile, please read that first to get more background.) A little over a month ago (has it really been that long/short?) she was diagnosed with Stage 4 brain cancer. They hadn't decided any treatment or no treatment at that point, it was all just rushing quickly in to overwhelm us all.
It has been quite the roller coaster ride of emotion while doctors decided whether she was able to handle treatment, not knowing whether her body will respond to it or not. At one point, a couple weeks ago, they told her that she would not live more than four days. So we waited and said our goodbyes just in case. Me over in the corner holding out for some sort of miracle, begging God that this couldn't be it. And she's still alive. They changed their minds and started treatment; radiation then chemo. She is currently still undergoing radiation and has been responding beautifully to the treatment. I can only thank God for giving her this time and for giving me a new attitude.
She was released from the hospital Saturday. However, she is back in because some blood clots have formed in her lungs, so they want to monitor those as they progress with treatment. After visiting her last week, I am strongly encouraged because she was talking more like her normal self.
Two prayer requests: that her short term memory returns unscathed, that the blood clots smooth themselves out, and that radiation continues to show great signs of improvement. Ok, I guess that was actually three. I lied. Oh well.
Last time I talked about cherishing and appreciating the ones you are with. I admitted and still am admitting that I am not always 100% appreciative of the time my man gives to me (since time is the greatest gift of all). And I have been working on changing my attitude, because who wants to hang with an ungrateful nag anyways? Not me. I really feel that, while I am not perfect, I have been making great strides in the right direction. I am holding on just a little bit tighter to all the loves in my life because if I died tomorrow, I want them to remember how much I loved them. I am working on cherishing my cutie, because he deserves to be cherished by the woman he loves.
Hang on tight to all your loved ones, remember that every day is such a blessing. And if you need someone to talk to, there is always one God who is listening in eager anticipation.
As for me, God is granting me my miracle, one day at a time.
Love Always,
Joanna Rose
Monday, June 17, 2013
Monday, June 3, 2013
No Sew Bench/Chair Re-Upholstery
First things first: It's the weekend, so it should be cocktail time. I know you were all wondering when I'd bring in my love of cocktails and share my cocktail secrets with you. Just kidding, there are no secrets, just lots of cocktails.
Cocktail for this project:
Since this is an all day extravaganza (in between paint dry times and etc.) I will be drinking a cocktail that tastes just as delicious when not freezing cold and still holds up after the ice melts a bit.
Rosemary Lemonade (serves 4) (recipe courtesy of Laguna Beach Culinary Arts):
6 sprigs rosemary
1 cup sugar
1 cup lemon juice
8 oz. Vodka (or more, depending on taste)
1 liter Club Soda
In a 1-quart saucepan, combine sugar, 2 rosemary sprigs, and lemon juice. Let it simmer on low for roughly 5 minutes until lemon stirring every 30 seconds until all the sugar is dissolved in the lemon juice. Be careful to not over cook it as the rosemary will start to make it a little bitter.
To serve, fill a 16 oz glass with ice and put one rosemary sprig in each glass. Add 3 tablespoons of rosemary lemon syrup to each glass (you will have extra, so no need to be precise). Next, add your roughly 2 oz of vodka and stir well. Final touch, fill the rest of your glass with club soda, give it one last quick swirl, and ENJOY!
Now onto the project!
I orginally bought this bench as my first piece of furniture when I moved into my apartment with the intention of recovering it and perhaps adding a bit more fluff to it's kind of lifeless seat. I have lived here for over a year and I am finally getting around to it. Some projects With pretty much all projects, I struggle to find that initial "heave-to" to actually start-or, like in this case, and complete-them.

What I love about this project is that it is so simple and easy to do. No sewing is necessary, just a staple gun and a hammer (for those pesky staples that just won't go in all the way). I chose to repaint the wood as well, because it was painted brown...yes that is right, painted brown. I know, I still can't understand why someone would paint the wood brown either. Mind-boggling.
What You Will Need:
- Staple Gun and 3/8" staples
- Small light-duty hammer (a tack hammer or mallet would work best)
- 1/2 to 1 yard of upholstery fabric (depending on size of seat)
- 2" Foam 1/3 yard, optional (depending on size of seat & desired height of cushion)
- 1/2 yard to 1 yard of batting, nothing too thick, this is just gives a smoother look after all fabric is on
- Spray Paint and Spray Primer
Lay fabric out on a flat surface and place batting on fabric; cut off any excess. Cut foam with a serrated blade to seat size and then place it centered in your batting. Lastly, place seat on foam upside down. When securing fabric to the seat, corners are last! Starting with the two shorter edges, pull fabric taut and staple outside edges first, then in the middle. Repeat on the long edges, stapling from the outsides towards the center. It is important to keep your stapling consistent on opposing sides. For the corners, for a nicely upholstered look, fold them like you would a present and align them either on the long side of your bench or right along the corner. (If you have more rounded corners then follow the rounded edge and do not fold into a triangle like shape.)
Enjoy these photos of the before paint progress!


Now for the fun. I don't know why, but painting is always something I enjoy. A viable excuse to be messy? Maybe. Viable excuse to get paint on myself? More likely... Anyways, I love painting.
Steps for Re-surfacing.
Step 1: To prep your piece, get your lovely re-upholstered top as far away from your wood to be painted as possible. Nothing is going to ruin your work on that seat cushion. Well, at least not the paint.
Step 2: Lightly sand your surface all over. This will give something for the primer to adhere to.
Step 3: On a not windy day with lots of sun (yes those days do exist in Seattle, they are just a little rarer.) lay a plastic paint tarp from the Dollar Store down and place your seat bottom in the center upright.
Step 4: Spray your piece with Primer. I know you are all scoffing at the primer since so many paints come with it mixed in, but trust me, it helps big time. When spray painting, maintain about 8-9 inches of distance between spray can and piece of furniture, this helps with dripping; also keep the spray moving, too much paint in one area will make the paint drip. Let it dry completely. Estimate 45 min.
*Quick note about primer: the color of primer is very important. If you are painting over anything with red or black undertones or painting with any red or black undertones, use a gray primer. Gray is great for really covering over those strong colors and keeping the top color more true to its actual color.*
Step 5: Flip the seat over, lightly sand and then it's time for Primer round 2! Let dry completely.
Step 6: Bring on the color!! Flip seat to upright position once more, spray all over with color. Let it dry 45 min. Flip over and repeat. After it is dry, check for any missed spots and paint as needed.
Step 7: If desired, spray with a gloss or matte sealer. Let it dry for 24 hours.
Step 8: Re-assemble your seat by lining up screw holes and screw everything back together.
Congratulations! You have just successfully refinished a piece of upholstery! Check out my completed bench! Isn't she a beaut!
 |
| I was not expecting the color to be this vibrant, but I really love it! Such a beautiful shade of purple. |
 |
| Love, love, love. |
 |
Love Always,
Joanna Rose
Wednesday, May 15, 2013
An Exercise in Frugality
There is no dignity quite so impressive, and no independence quite so important, as living within your means. – Calvin CoolidgeFrugality. It means a lot of things to different people. It looks different for everyone. Some people just don't practice it.
I am a newcomer to this world. So please keep that in mind as I start to talk about my experience with saving money and living within a real budget. Not just the vague idea I had when I first started.
For me frugality means living well below my means. I have always lived within my means and I've always said that "I should not be able to afford the way I live." Basically, I should be saving more and be less spendy on every other aspect of my life. I am a young adult, I should not be able to spend money like I make big bucks.
I am viewing this process of becoming a more frugal woman as taking small steps of change in hopes that they will stick much better (and so far they have) than one grand change. It's like going on a diet. If I cut everything bad for me out all at once and started exercising like mad every day for a couple hours, I would get exhausted and would quickly run out of motivational steam.
Anyways, that's a lot of
Now, can I just put it out there that I don't like to (or very easily) admit when my dad is right on things. I want to do it my way. (Just busted out in the Frank Sinatra song; I will let you envision that for a minute.) So I am publicly admitting that my father convinced me to try out Quicken 2013. I love it!! I am by no means master at its use, but it does allow me to break all my costs down into the categories I want to track.
Now for the ultimate, the pièce de résistance! (I
Let me just say, I LOVE IT!! There are so many ways to go about this, I've been trying this out for a couple weeks and I need to work out a couple kinks, but for now, I get cash once a week, and that's it for everything all week: groceries, home improvement, you-name-it-I-buy-it. ;) I have a fabric cash envelope project in the works that I can't wait to share with you - this is exciting for me because it will be my first adventure into accessory making.
Going cash-only gives me better understanding of what categories I can change in my Quicken to be more general, since that's what I've noticed I care about more as opposed to being very specific about subcategories and the like. Now if only I could get better help with setting up things within Quicken...

Love Always,
Joanna
Thursday, May 9, 2013
Fragile
This was not the post I was originally intending on writing. Originally, I was writing a post about my recent exploits in the methods of a more frugal lifestyle. Another time.
Right now, I have more pressing matters in my head and my heart. All I can think about is how short life is and how no matter how much I plan on doing in the future, those plans can change instantly in one short minute.
A week ago a close friend of mine was diagnosed with Stage 4 brain cancer. And as more doctor's visits come and go and treatment options are explored, it just keeps looking worse and worse. She's younger than you'd expect someone with cancer to be. She's got plans for the years ahead.
The news hit me pretty hard-I'm still reeling-and I can't focus on anything. I think of all the people in her life. Her husband and the love that I could hear in his voice as he talked to her in the hospital. How if she were to leave this world, he'd be left without his partner, the one who was supposed to walk beside him for the rest of their lives. I can't imagine how heart-wrenching it must have been to hear from the doctor that this situation has gotten so hopeless. Her kids to lose their mother before they have a chance to finish growing up themselves. I can not imagine.
I think about my own partner. I think how utterly destroyed I would feel if something happened to him, before we even had gotten a chance to start a life together. Completely distraught. I think of all the people in this world that I love, of whose lives Iam chose to no longer be as active a participant as I want to be.
And I think about her words to my boss and friend, "Cherish [your family], those moments are precious." I don't know the last time I cherished moments with my boyfriend or my family or moments with any one person who matters to me. It's been a while.
I am not saying that I will all of a sudden start to cherish everyone like never before. But I should probably be more intentional about showing it to them. I'm not perfect, so I know it may take some time.

Right now, I have more pressing matters in my head and my heart. All I can think about is how short life is and how no matter how much I plan on doing in the future, those plans can change instantly in one short minute.
A week ago a close friend of mine was diagnosed with Stage 4 brain cancer. And as more doctor's visits come and go and treatment options are explored, it just keeps looking worse and worse. She's younger than you'd expect someone with cancer to be. She's got plans for the years ahead.
The news hit me pretty hard-I'm still reeling-and I can't focus on anything. I think of all the people in her life. Her husband and the love that I could hear in his voice as he talked to her in the hospital. How if she were to leave this world, he'd be left without his partner, the one who was supposed to walk beside him for the rest of their lives. I can't imagine how heart-wrenching it must have been to hear from the doctor that this situation has gotten so hopeless. Her kids to lose their mother before they have a chance to finish growing up themselves. I can not imagine.
I think about my own partner. I think how utterly destroyed I would feel if something happened to him, before we even had gotten a chance to start a life together. Completely distraught. I think of all the people in this world that I love, of whose lives I
And I think about her words to my boss and friend, "Cherish [your family], those moments are precious." I don't know the last time I cherished moments with my boyfriend or my family or moments with any one person who matters to me. It's been a while.
I am not saying that I will all of a sudden start to cherish everyone like never before. But I should probably be more intentional about showing it to them. I'm not perfect, so I know it may take some time.
Today was especially rough, cried at my desk off and on for four hours. And then on the bus. And now as I write this. I know everything will happen as God intends it to happen. And I am sad over the possibility of losing a friend. But God has given me the most wonderful man, who helps me to want to cherish every moment. Because every. single. moment. is one that should be cherished. I am so thankful. For everything. But really, I am thankful for this:

I can't explain it, but this lets me know that everything will work out. My prayer is now for a miracle against all odds. God, I am begging for a miracle. I want need a miracle. I am not ready for this obstacle you have given me. I will be an ostrich. I will stick my head in the proverbial sand. I will not let her go. Please don't let her go.
Please dear friends, cherish your family and other loved ones. And please, please pray for my friend. Pray for a miracle. Pray for healing, and love.
Love you all,
Joanna
Thursday, April 25, 2013
Cream Cheese Wontons (Pick Up Stix Copycat)
When I was living in Southern California, one of my absolute favorite things was Wonton Wednesdays at Pick Up Stix. So. Good! And so Cheap! 25 cents per wonton. I could easily eat 10 of them. But I didn't. Well, most times I didn't. Now you know my true obsession...
Seeing as how Seattle has yet to become home to a Pick Up Stix, there is no more Wonton Wednesdays for me. Well, that is, until tonight, when I decided to recreate them. Actually, I enhanced them. By the way, I only made these because I stupidly bought 6 bars of cream cheese while it was on sale in anticipation of making a cheese cake for my Adorable Latino. (The recipe I ended up using, which was ah-mazing!, only required one bar. Aka, shit, what am I going to do with all this cream cheese? More cheesecakes?Maybe Most likely.) I based my recreation off of Nerdy Baker's, she seemed as obsessed with them as me, which you can find here. But like I said, I changed it up. Being a connoisseur for many years, I added a key ingredient and one not-so-key, but definitely a game-changer.
Let's get started, shall we? Gather your ingredients:
Ingredients:
1 8 oz bar cream cheese (Let's be honest, Philadelphia Cream Cheese wins every. single. time. Do your taste buds a favor and use it.)
48 wonton wrappers
1 egg, beaten
1/3 c. green onion, very finely sliced
1 T. Soy Sauce *key ingredient!*
1/2 tsp. kosher salt, then add more to taste
4 oz. water chestnuts, finely chopped (you can use more, but I personally feel it drowns out all the other awesome flavors you are mixing in, so I recommend the "less is more strategy")
Peanut Oil (enough for 2 inches in your pan or pot)
2 tsp. secret ingredient (shh. don't worry, I'll tell you later)
Sweet Chili Sauce, for dipping (optional)
Chinese Hot Mustard, for dipping (optional)
Process:
Step 1. Put peanut oil in pan and heat to roughly 300 degrees; this will take roughly 10 min. I am not very precise with the temperature; I like to test out the temperature with some wonton strips.
Step 2. Place cream cheese, sliced green onion, chopped water chestnuts, soy sauce, and salt in a small mixing bowl and use a fork (or hand mixer) to blend together. You can taste test here, but I recommend that you make a sample wonton and cook it to taste to really get the full flavor profile to know if it needs more salt or more secret ingredient. ;)
Step 3. Are you ready to add your secret ingredient? Cause I sure was! Sriracha sauce!! I love this stuff. I add it tosauces, sandwiches pretty much everything I can. MMM. Mix the Sriracha in well.
*For those of you who do not like spicy food, this does not make it spicy at all, just little extra/different flavor.
**Keep mixture covered with a damp towel so it doesn't dry out at all.
Step 4. To test the oil temperature, cut three wonton wrappers into strips, separate them. Take one strip (with tongs or a skimmer, no getting oil burns, please!) and dip into the hot oil.
If the oil is hot enough, it should rapidly sizzle. If it is hot enough, throw all the strips you cut and fry them until they are lightly golden brown (watch carefully! they will cook quick). Pull them out and let them drain on some paper towels.
If the oil does not react at all or it only reacts a little, it is still too cold and the heat should be turned up a little. Repeat temperature test after 5 minutes. If still not hot enough, continue heat and test cycle until the desired sizzle-y effect happens.
Step 5. Now that the oil is to the correct temperature, it's time to make your sample wonton to cook and taste test. Lay out one wonton wrapper, put roughly 1 tsp. of the cream cheese mixture in the center of the wonton, as shown below. Brush beaten egg around the edges of the wonton wrapper; I recommend using the back side of a small spoon (this helps get a thin even coating). Take one corner and fold it over towards the opposite corner (forming a triangle); leave about 1/4 inch of the bottom showing. Press the edges to get out any air bubbles. Put just a dab of egg in the center of the folded edge. Bring the side edges over to the dab and again, press to seal the edges and get extra air bubbles out. Finally pull the top down (like an envelope) and press to seal. (Please note: the top already has egg from the initial brushing.)


Using tongs or a skimmer, place in the oil and let it cook for 30 seconds. Turn it over, let it cook over another 30 seconds. Continue turning until it is a light golden brown, pull out and let it drain and cool for 1 minute. (I know it's so hard to wait!! I could barely contain myself. But let me just say, molten cream cheese + my tongue = pain for days.)
After my initial taste test, my cream cheese mixture needed a pinch more salt, which I added, and then taste tested again. Juusssstt right.
Step 6. I did my wonton forming in mass assembly. Lay out as many wonton wrappers on my cutting board as it could handle (6 at a time). Then follow the same process in Step 5. Create all of your wontons before you start cooking them in mass quantities. I don't know about you, but when I am cooking, I can't watch and flip things at the same time as other things off the stove.
Step 7. Cook your wontons no more than 5-6 at a time. Even if your pan can handle more than that, this is a small enough number that you can keep track of each one's cooking progress. Drain on paper towels and let cool for 1-2 minutes. Depending on how many you are making, you may want to turn your oven on to 150 or 200 to keep them warm but not crazy hot.
Step 8. If desired, put sweet chili and hot mustard in a couple of small, shallow bowls or ramekins, place on a serving plate surrounded by delicious cream cheese wontons. And last but certainly not least, enjoy!!

Hearts Always,
Joanna
Seeing as how Seattle has yet to become home to a Pick Up Stix, there is no more Wonton Wednesdays for me. Well, that is, until tonight, when I decided to recreate them. Actually, I enhanced them. By the way, I only made these because I stupidly bought 6 bars of cream cheese while it was on sale in anticipation of making a cheese cake for my Adorable Latino. (The recipe I ended up using, which was ah-mazing!, only required one bar. Aka, shit, what am I going to do with all this cream cheese? More cheesecakes?
 |
| These wontons are light and crispy on the outside and warm and gooey-cheesy on the inside. Yum. Yum. Yum. Win. Win. Win. |
Let's get started, shall we? Gather your ingredients:
 |
| I may have gotten a bit ahead of myself and started mixing before the picture taking. :) |
1 8 oz bar cream cheese (Let's be honest, Philadelphia Cream Cheese wins every. single. time. Do your taste buds a favor and use it.)
48 wonton wrappers
1 egg, beaten
1/3 c. green onion, very finely sliced
1 T. Soy Sauce *key ingredient!*
1/2 tsp. kosher salt, then add more to taste
4 oz. water chestnuts, finely chopped (you can use more, but I personally feel it drowns out all the other awesome flavors you are mixing in, so I recommend the "less is more strategy")
Peanut Oil (enough for 2 inches in your pan or pot)
2 tsp. secret ingredient (shh. don't worry, I'll tell you later)
Sweet Chili Sauce, for dipping (optional)
Chinese Hot Mustard, for dipping (optional)
Process:
Step 1. Put peanut oil in pan and heat to roughly 300 degrees; this will take roughly 10 min. I am not very precise with the temperature; I like to test out the temperature with some wonton strips.
Step 2. Place cream cheese, sliced green onion, chopped water chestnuts, soy sauce, and salt in a small mixing bowl and use a fork (or hand mixer) to blend together. You can taste test here, but I recommend that you make a sample wonton and cook it to taste to really get the full flavor profile to know if it needs more salt or more secret ingredient. ;)
Step 3. Are you ready to add your secret ingredient? Cause I sure was! Sriracha sauce!! I love this stuff. I add it to
*For those of you who do not like spicy food, this does not make it spicy at all, just little extra/different flavor.
**Keep mixture covered with a damp towel so it doesn't dry out at all.
Step 4. To test the oil temperature, cut three wonton wrappers into strips, separate them. Take one strip (with tongs or a skimmer, no getting oil burns, please!) and dip into the hot oil.
If the oil is hot enough, it should rapidly sizzle. If it is hot enough, throw all the strips you cut and fry them until they are lightly golden brown (watch carefully! they will cook quick). Pull them out and let them drain on some paper towels.
If the oil does not react at all or it only reacts a little, it is still too cold and the heat should be turned up a little. Repeat temperature test after 5 minutes. If still not hot enough, continue heat and test cycle until the desired sizzle-y effect happens.
Step 5. Now that the oil is to the correct temperature, it's time to make your sample wonton to cook and taste test. Lay out one wonton wrapper, put roughly 1 tsp. of the cream cheese mixture in the center of the wonton, as shown below. Brush beaten egg around the edges of the wonton wrapper; I recommend using the back side of a small spoon (this helps get a thin even coating). Take one corner and fold it over towards the opposite corner (forming a triangle); leave about 1/4 inch of the bottom showing. Press the edges to get out any air bubbles. Put just a dab of egg in the center of the folded edge. Bring the side edges over to the dab and again, press to seal the edges and get extra air bubbles out. Finally pull the top down (like an envelope) and press to seal. (Please note: the top already has egg from the initial brushing.)

 |

 |
| The top corners will fold to the center where I already placed a dab of egg. |
Using tongs or a skimmer, place in the oil and let it cook for 30 seconds. Turn it over, let it cook over another 30 seconds. Continue turning until it is a light golden brown, pull out and let it drain and cool for 1 minute. (I know it's so hard to wait!! I could barely contain myself. But let me just say, molten cream cheese + my tongue = pain for days.)
After my initial taste test, my cream cheese mixture needed a pinch more salt, which I added, and then taste tested again. Juusssstt right.
Step 6. I did my wonton forming in mass assembly. Lay out as many wonton wrappers on my cutting board as it could handle (6 at a time). Then follow the same process in Step 5. Create all of your wontons before you start cooking them in mass quantities. I don't know about you, but when I am cooking, I can't watch and flip things at the same time as other things off the stove.
Step 7. Cook your wontons no more than 5-6 at a time. Even if your pan can handle more than that, this is a small enough number that you can keep track of each one's cooking progress. Drain on paper towels and let cool for 1-2 minutes. Depending on how many you are making, you may want to turn your oven on to 150 or 200 to keep them warm but not crazy hot.
Step 8. If desired, put sweet chili and hot mustard in a couple of small, shallow bowls or ramekins, place on a serving plate surrounded by delicious cream cheese wontons. And last but certainly not least, enjoy!!

Hearts Always,
Joanna
Tuesday, April 16, 2013
Lamp Makeover
I moved into this apartment one year ago, and if any of you DIYers are like me, the improvements are never-ending. I finish one improvement only to discover four more that had been "band-aided" by the original solution quick-fix. Holy shit, I need more space less stuff.
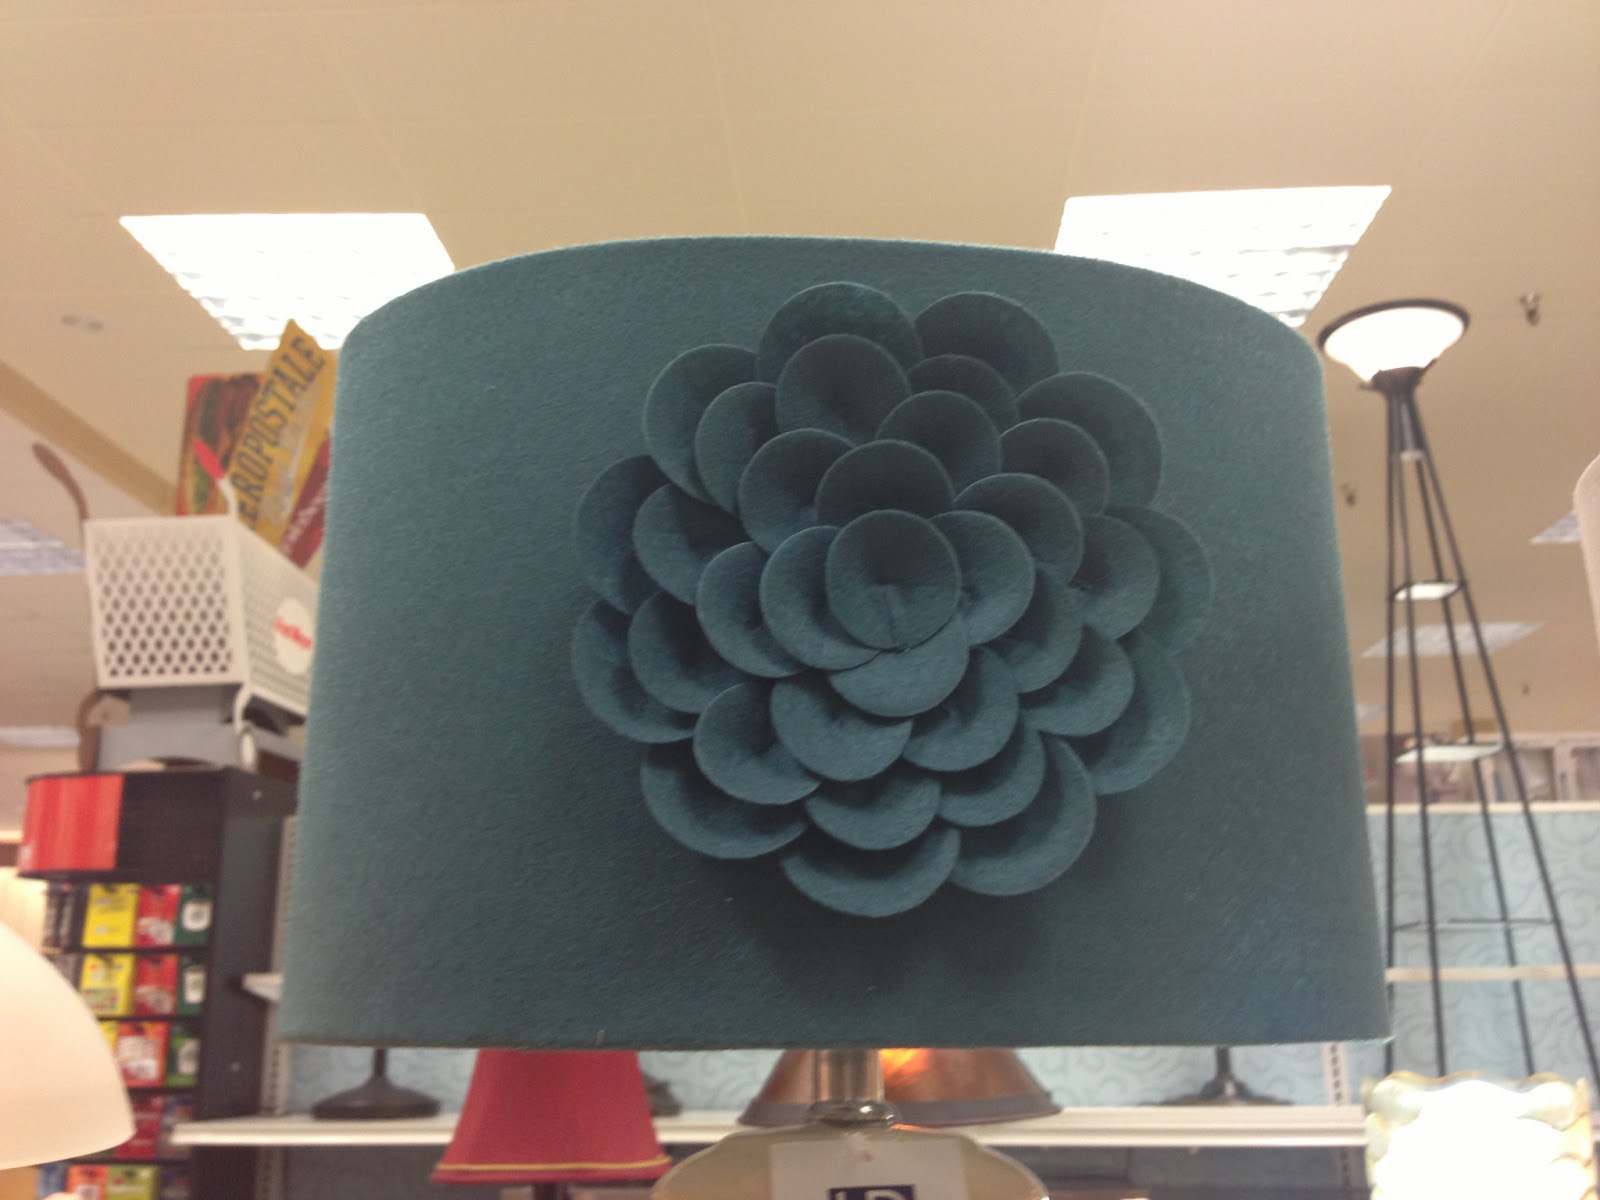
 I found this lamp at Goodwill Ballard for $2.99 (yes that's right). It did not come with a lamp shade or lamp harp...I should have put it down, but it's so beautiful! (And I'm stubborn and wanted the beautiful lamp in my apartment.) I saw this $15-$20 lampshade at Fred Meyer and decided to use it as my inspiration piece. Are you ready for a cheap, fun, no-sew lampshade?
 Read on! (too corny, I'm sorry)
 I love the deep teal color on this lampshade and the felted flower. *Love*Love*Love*
I found the perfect bright teal felt and decided to put lots of smaller flowers with pearl centers rather than one large flower. So without further ado, here is the lampshade pre-makeover:

Pretty hideous, right? This was perfect for my lampshade makeover!
To get the right pattern for recovering the frame of the shade, you take a pen (or piece of chalk) and place the shade seam side down and start rolling the shade and tracing along the bottom until the shade has completed a full circle. Place the seam at the start of the first line and roll and trace the top until the shade has again gone full circle. Allowing for 1/2 inch seam allowance on top, bottom, and sides, cut out the piece. Line up the lampshade so that there is 1/2 inch on top and 1/2 along the bottom. Wrap the piece around the lampshade so the sides connect. Fold over the top side for a nicer edge finish and hot glue in place. Starting on the top fold sections of the overlap over the top edge and hot glue to the inside of the lamp shade. Repeat until all top overlap is glued. Now flip the shade over and repeat with the bottom. Make sure that the fabric is taut before glued the bottom down.
Now for the real fun. Edge the bottom (& top if you wish, but you will need to buy more trim is desired) with the half pearl trim. It should look like this once you have reached this step:
 I know I said this was a No-Sew project, but this step is so easy, you will not feel like you are sewing. For forming the flowers, you will need to cut small circles roughly 1" to 1 1/2" wide. Fold a circle in half and pull thread through; repeat for five - six circles. Once you are done adding circles, pull the thread back through the first circle, so that the "petals" come together and actually look like a simple flower. Tie a knot, cut the thread and hot glue onto the shade; then hot glue one pearl in the center of the flower. (See above for a flower sample.) I found this step much easier with the shade already attached to the lamp base. (Think decorating a cake on a cake stand.) Repeat flower making/attaching processes until you are happy with the number of flowers on the shade.
 Didn't it turn out great?!? How did your lamp shade makeovers turn out? I'd love to see, so comment below with pictures or links!
Many Blessings!
Joanna Rose


I found the perfect bright teal felt and decided to put lots of smaller flowers with pearl centers rather than one large flower. So without further ado, here is the lampshade pre-makeover:

What You Will Need:
- Lampshade
- 1/2 yard felt (depends on size of lampshade) - $2.49
- glue gun
- scissors
- thread and small needle
- 10 mm glass pearls - $1.00
- 1 yard half pearl trim - $1.79
To get the right pattern for recovering the frame of the shade, you take a pen (or piece of chalk) and place the shade seam side down and start rolling the shade and tracing along the bottom until the shade has completed a full circle. Place the seam at the start of the first line and roll and trace the top until the shade has again gone full circle. Allowing for 1/2 inch seam allowance on top, bottom, and sides, cut out the piece. Line up the lampshade so that there is 1/2 inch on top and 1/2 along the bottom. Wrap the piece around the lampshade so the sides connect. Fold over the top side for a nicer edge finish and hot glue in place. Starting on the top fold sections of the overlap over the top edge and hot glue to the inside of the lamp shade. Repeat until all top overlap is glued. Now flip the shade over and repeat with the bottom. Make sure that the fabric is taut before glued the bottom down.
Now for the real fun. Edge the bottom (& top if you wish, but you will need to buy more trim is desired) with the half pearl trim. It should look like this once you have reached this step:


Many Blessings!
Joanna Rose

Subscribe to:
Posts
(
Atom
)